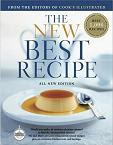
Wednesday, August 5, 2009

88. Basic Spice Rub for Grilled Pork


Date Cooked: July 31, 2009
Page: 582
Rating: B+

From a recipe perspective there isn’t much to say about this. I mixed cumin, curry powder, chili powder, black pepper and sugar. Simple as this is though I almost failed. Once again I need to pay closer attention to the quantities. Everything except the black pepper was measured in tablespoons. The pepper was measured in teaspoons. If it wasn’t for the fact that I ran out of black pepper, I would have added too much. Anyway the potential disaster was averted and the rub was ready for application.

Rating: B+. It was a great rub and definitely enhanced the flavor of the pork.


Tuesday, August 4, 2009

87. Grilled Eggplant with Cherry Tomato and Cilantro Vinaigrette


Date Cooked: July 31, 2009
Page: 162
Rating: B+

I’m living the week as a pseudo-bachelor. My wife is away with my eldest on a vacation in Florida and I am at home ‘relaxing’ with my youngest. This actually translates into attempting to accomplish as many home renovation projects as time and money allows. I also figured this was a good time to cook items from the book that my wife would probably not enjoy. Anything with tomatoes is very low on her list of enjoyable menu options. I’m not the biggest fan of tomatoes either, but I have been making a conscious effort to change that. This project has been a big help in that goal. I’m still not looking forward to the recipes containing anchovies. That is going to be a challenge.

Eggplant is not the first vegetable I would go to when looking for something to pair with… well anything. I have had this aversion to it for no good reason. Maybe as a child the name turned me off and since it was never a childhood staple I have had no reason to try it. Awhile back I made a stir fry with it and I enjoyed it. But I had yet to eat it as the star of a dish. I figured now was a good time to change that, especially since this recipe was made for the grill.

Prepping the eggplant was as simple as slicing it into thick rounds and brushing them with garlic, oregano and olive oil. The vinaigrette on the other hand required a little more work. The cherry tomatoes were quartered and then I diced a shallot and minced some garlic. I roughly chopped some cilantro and everything was tossed with some olive oil and lime juice. I let the vinaigrette rest while I prepared the rest of the dinner.

Now I am getting much better on the grill but I still have a lot to learn, especially timing. I placed the eggplant on the hot grill and closed the lid. I figured that they should take about 8 minutes and I should probably flip them at the 4 minute mark. I would like to point out that my grill has hot spots and I am not talking about areas that are warmer. I have spots on my grill that that approach molten metal temperatures. After 4 four minutes several pieces were glowing red, but of course other pieces were beautifully grilled. So I flipped them all over and moved the pieces away from the molten sections of my grill. I only let them go a few more minutes before removing and plating.

I poured the vinaigrette over the eggplant and served.

Rating: B+ I really enjoyed the flavors of this dish. I didn’t even mind the tomatoes in it. This could almost of had an A- rating except that the skin of the grilled eggplant was extremely tough and detracted from the smooth texture of the eggplant. The best I could describe it would be like eating a cupcake and then biting into a hidden piece of the cupcake paper cup. Next time I’ll skin the eggplant and I am surprised it didn’t mention it in the book… then again maybe it did. I think I will double check that.

Monday, July 20, 2009

86. Thai-Style Beef Salad


Date Cooked: July 17, 2009
Page: 117
Rating: B+

I had been eyeing this recipe for quite some time and finally got around to cooking it. Thanks in large part to my neighbor for delivering a rather large bunch of fresh lettuce from his garden. Salads are one of those things I keep telling myself to eat more of but I always consider them a lot of work. This one showed me that I have nothing to be afraid of, but that I need to invest in a good salad spinner.

I started off washing the lettuce. The one thing about fresh from the garden produce are little crawly things. I thoroughly, bordering on obsessively, washed the lettuce in my sink. After freeing a few mini slugs, ants and some other unidentifiable critters, the lettuce was fit for consumption. Drying the lettuce would have been easier with a salad spinner. I had several feet of my counter cover with kitchen towels and lettuce.

With the lettuce done it was time to cook the flank steak. I pan-seared it in a small amount of oil and while that was happening I prepped the cucumber and onions and the marinade/dressing. The marinade was equal parts fish sauce and lime juice with some red pepper flakes and sugar. Half of this was reserved as the dressing while the remainder was used to marinate the sliced flank steak.

When the flank steak was finished cooking it was sliced and marinated for 10 minutes. Once done marinating the steak, cucumber and onions were tossed in the dressing and then served on a bed of lettuce and finally topped with peanuts.

Rating: B+. I liked this salad but I had one complaint. Between seasoning the flank steak prior to searing in, and then marinating it in a dressing based on fish sauce, it was a bit salty. The dressing alone was fantastic but the flank steak probably could have skipped the short marinating session. Overall I was happy with this dish and I look forward to making more salads.


Thursday, July 16, 2009

85. Carrot Cake with Cream Cheese Frosting


Date Cooked: July 13, 2009
Page: 835
Rating: A

I feel lately that my stress level has been abating and I am getting excited about cooking from the book again. I haven’t done a lot of baking from the book mostly because it intimidates me so I figured why not try to bake a cake. Carrot cake seemed as good a choice as any since I had some carrots that needed to be used. When I first started gathering the ingredients for this I was expecting it to be difficult but after reading through the recipe this seemed like it would be relatively pain free… I wasn’t really paying attention though.

Starting off I measured out most of the dry ingredients and whisked them together. I then took the bag of carrots I had and ran them through my food processor’s shredding disk. For those that have read my blog from before, I don’t care much for my food processor. It did a poor job of shredding the carrots and I ended up having to pulse them a few times extra to cut up the larger chunks. Once the carrots were processed I tossed them with the dry ingredients. This is where I began to realize what I was getting into. I needed to wash the food processor so I could combine the sugar, eggs and oil. The food processor is a pain in the ass to clean so I tend to avoid it, this was the first of several washings it would need to complete the recipe.

Once the food processor was cleaned I combined the sugar and eggs and then slowly added the oil with the processor on. A nice emulsion formed and once done I folded it into the dry ingredients. Within a few minutes I had a nice batter ready to pour into my prepped baking pan. Into the oven for 40 minutes until a toothpick came out clean. Then it had to cool for 2 hours.

While the cake cooled I set to work cleaning the food processor again to make the icing. The cream cheese icing was as simple as processing all the ingredients in the food processor for less than a minute. I transferred the icing to a bowl and let it chill a little in the fridge until the cake was cool enough for frosting. While waiting I had the opportunity to once again clean the food processor. Really is time for a newer, easier to clean model.

When the cake had finally cooled I spread the icing on (something I am not very talented at). Apparently the cake was not cool enough though and the icing began to get a touch runny so I put it all back in the fridge to chill a little longer before cutting into it to eat!

Rating: A. The cake was very moist and the carrots were very subtle but still noticeable. The cake was lightly spiced and not overly sweet which made the icing all that much better. I definitely enjoyed my piece and had to resist the temptation to help myself to a second, much larger slice.


Wednesday, July 15, 2009

84. Gas-Grilled Bone-In Chicken Thighs


Dated Cooked: July 7, 2009
Page: 608
Rating: A-

Its summer grilling season and I intend to make good use of the grill this year. I figured chicken should be easy enough and something can only be stored in the freezer for so long. Once the chicken thighs had thawed I brined them.

** Please hold for this important culinary announcement. The night before I had cooked some chicken without brining it and I must say it just shouldn’t be done. I know, you are probably tired of me praising the virtues of brined poultry so I promise to make this my last tirade. Brine your chicken! DO IT! No excuses! Your chicken will be better for it. Okay done. We now return you to your regularly scheduled program. **

When the grill was hot enough I removed the chicken from the brine, patted it dry and then seasoned it with salt and pepper. The chicken was grilled on high heat to give a nice crust before cooking it over lower heat to cook through. I am one of those people always scared to undercook chicken but I am beginning to trust myself a little more and rely on the meat thermometer to tell me when it’s done. Although I need that less and less all the time. When the chicken was done it was plated to eat.

Rating: A-. Simple and delicious chicken that was juicy and full of flavor with a nice crispy skin. Couldn’t ask for more… well actually I could ask for more since chicken thighs aren’t that big.


Tuesday, July 14, 2009

83. Grilled Asparagus with Grilled Lemon Vinaigrette


Date Cooked: July 7, 2009
Page: 134
Rating: B

My parents were down visiting for a week and now that we are into summer I am feeling the need to use the grill. And since I have done very few grilled recipes I figured this was a good time to start. We had several bunches of asparagus left over from a party we held on the weekend and tossing them on the grill would be a simple way to prepare them.

I started by tossing the trimmed asparagus in oil, salt and pepper. Once the grill was hot enough I placed them on to cook. I also added a halved lemon to the grill. While they were cooking I finely chopped some shallots and added them to a bowl with thyme, extra-virgin olive oil, salt and pepper and the juice from the grilled lemon. I whisked up the vinaigrette and drizzled it over the asparagus. Well drizzled is such a fine technique. I actually dropped clumps of shallots on the dish.

Rating: B. I enjoyed this preparation of asparagus but I had two complaints. The vinaigrette was very lemony, not bad just strong lemon flavor. In addition, the asparagus spears were thin and cooked rapidly on the grill. This would probably be better with thicker spears.

Thursday, July 9, 2009

82. Turkey Tetrazzini

Date Cooked: June 8, 2009
Page: 292
Rating: A

I didn’t plan to make this dish but the circumstances surrounding a thawed turkey left me with a whole roast turkey and no dinner for it. My mother-in-law picked up a frozen turkey because it was on sale and it was left to thaw in my fridge with the intention of having it roasted for a family dinner. Life is hectic and dinner plans were cancelled but I still had thawed 15lb turkey that needed to be cooked. So I roasted it.

Now the last time I roasted a turkey it tasted great and the picture was horrible… The picture actually scares me to look at. This time around the turkey looked golden brown and just delicious. Of course I never thought to take a picture of it because it wasn’t for the book. Anyway I carved it up, we ate some and I figured I didn’t mind having turkey sandwiches for the next week or two (I love turkey sandwiches!). The next day though I was lamenting the fact I had not really cooked anything from the book in a long time when I realized that there was a recipe that required cooked turkey meat! I couldn’t think of a better way to utilize the turkey, not to mention when else was I going to have 4 cups of cooked turkey meat available.

This recipe was a vicious reminder of all my poor cooking habits that I had been trying to change. What a month of cooking familiar recipes can do to a sense of organization. Let’s just say that prepping the onions and mushrooms and turkey was easy. Everything after that was a near disaster. Basically three things needed to be on the go at once since I was trying to get dinner ready quickly. This was the first indicator of impending disaster. I was boiling water for the pasta, cooking down onions and mushrooms and trying to prepare the sauce which starts with a roux. Since I had decided that getting everything together first was somehow a waste of time I came very close to destroying the roux (but didn’t)… Let me stop for a second. This post is becoming as chaotic as my cooking techniques.

Okay, so cooking down the onions and mushrooms in butter was easy and once they had sufficiently released themselves of moisture I set them aside. The pasta I stopped cooking at al dente but since nothing else was ready it sat in the pot with a small amount of reserved pasta water. The sauce eventually came together with the only deviation from the recipe coming at the sacrifice of dried thyme instead of fresh thyme, I thought I had some (and I did), but it was a touch… aged, and not it the fine wine sense but more the backyard compost way. This is a common trend for me and fresh herbs. I always think I have them only to realize it wasn’t last week I bought them but several weeks ago. My sense of timing these days is a touch off.

So once everything was done the pasta and reserved water was mixed with the sauce, onions and mushrooms and turkey, oh yeah and some frozen peas. This entire mixture was placed into a baking dish and baked for about 30 minutes. I also forgot that I sprinkled the top with fresh breadcrumbs and parmesan.

When this dish was done and I pulled it from the oven, the whole ordeal was worth it.

Rating: A. This dish reminded me of the chicken pot pie. It was a stick to your ribs comforting meal. My wife loved it and both the kids ate it (although one decided that since I put the peas in it that I should take them out so he could eat it!). Next time I’m faced with four cups of chopped poultry I will try this again.

Tuesday, June 16, 2009

81. Spicy Caribbean-Style Cocktail Sauce

Date Cooked: May 10, 2009
Page: 21
Rating: A-

Okay this one should have been posted well over a month ago. We’re talking about a sauce that was made for some tough as rubber poached-shrimp I made. Well better late than never I guess.

As with most sauces they are rather simple to put together. I was a little perplexed when I started this sauce because it seemed light on wet ingredients. Basically I needed to mince scallions, peppers, ginger and garlic and mix them with some lime juice and brown sugar. After mincing for several minutes I figured why not give it a few pulses with the immersion blender. It is the one tool in my kitchen that I unfortunately under-appreciate. A quick whirl and the sauce looked great (and smelled great too!)

Rating: A-. This was one tasty sauce. When I had gone through the ingredient list I wasn’t sure what to expect but the final result was delicious! An excellent mix of sweet and heat. Although I do confess that in a grocery store mix up I grab a rather mild pepper instead of the jalapeño required. So after the initial tasting a little hot sauce was added to spice it up a little.

Monday, June 15, 2009

It’s Getting Dusty Around Here

Okay I somewhat apologize for my absence but these past few months have been hectic. I work in the beleaguered auto industry for one of the recently bankrupt companies and while my job still remains and I am busy in spite of all the doom and gloom, the stress does take a toll and you end up watching the pennies a little more. On top of that, we had several large outdoor projects to accomplish around the house this year which consumed a lot of time and money… but with all these excuses I am still excited to cook and look forward to a hopefully more relaxing summer with the opportunity to get in some serious grilling (a chapter of the book I have not cooked much from yet).

So for those who still check in every once and a while. Thanks for your patience and the posts should start back up soon!

Thursday, May 21, 2009

80. Classic Cocktail Sauce


Date Cooked: May 10, 2009
Page: 21
Rating: B

I prepared this sauce to go with the herb-poached shrimp from the last post. The sauce was painfully simple to make. Pretty much all I had to do was mix the ingredients together. My biggest issue was that fact that I really had to struggle to get the last bit of ketchup out of the bottle to make this recipe. My son was a little upset that we were now out of ketchup. Mixed into the ketchup was horseradish, salt and pepper, lemon juice, cayenne pepper and chili powder. After tasting the sauce I deviated a little and threw in some more chili powder and a liberal splash of hot sauce.

The picture pretty much looks like a bowl of ketchup.

Rating: B. The sauce was not bad but definitely tasted like spicy ketchup. I’m not a big fan of ketchup which is why I added even more heat to it. Was a good accompaniment to the shrimp though.

Tuesday, May 12, 2009

79. Herb-Poached Shrimp


Date Cooked: May 10, 2009
Page: 21
Rating: B+

** That is a very bad picture. I know. I failed at poaching shrimp.**

Shrimp were one of those foods that as a child I despised, but as an adult love. Although both my wife and I agree that the larger the shrimp gets the more important it is that it is cooked correctly. Although the recipe for herb-poached shrimp recommends extra large, all I had were large so they would have to do.

I started by peeling the shells off the shrimp which would be used to create a stock for poaching the shrimp in. If I had thought more about presentation, I would have left the tail piece on but I didn’t really think about it until later. Not that it would have mattered as you can tell by the picture. They looked horrible, but more on that tragedy shortly. With the shrimp de-shelled I set to making the poaching broth.

The shells were boiled in salted water for about twenty minutes. Once done the shells were discarded and into the hot liquid went, tarragon, parsley, coriander seeds, black peppercorns, lemon juice and white wine. The ingredients were boiled for a few minutes to allow their flavors to unite before the shrimp were added. Once the shrimp were in the solution the temperature was turned off and they were left to soak for 8-10 minutes. Or that’s how long they were supposed to be.

I think almost twenty-five minutes passed before I realized they were still in the stock. With great alarm I lifted the lid and was shocked by the disaster I had wrought! I could barely see the shrimp because the water had turned very milky white. I quickly removed the shrimp (and everything else in the water since I couldn’t see anything in the white liquid), and plunged them into an ice water bath to stop the cooking process, 15 minutes later than required.

I was a little heart-broken with this disaster since I knew the shrimp were very overcooked and tough. My wife’s family like shrimp and every family get together involves them. Well since this was a mother’s day meal with family I put them out anyway and they were still all eaten. The sauces I had made for them may have helped a little.

Rating: B+. I will make these again if only to validate that I screwed it up bad. You could taste the herb flavors but since they were so overcooked I’m sure a lot of the flavor that was gained was subsequently lost.

Monday, May 11, 2009

78. Chicken Piccata with Prosciutto


Date Cooked: April 30, 2009
Page: 341
Rating: C+

I’ve been working hard through the poultry section of the book because it seems to have the most recipes that can be thrown together quickly. While I am approaching 10% complete the poultry section is now just over 20% done.

The recipe starts off simply by prepping the chicken breasts into cutlets and then coating them in flour. These where quickly cooked in oil and then set aside and kept warm. Then the fun part began. Shallots, garlic and the prosciutto were sautéed until the prosciutto was lightly crisped. Some lemon slices and chicken stock were added and reduced. Once reduced, some lemon juice and capers were added and reduced further. Finally some butter and parsley were added before the sauce was spooned over the chicken and served.

Rating: C+. I guess if I had very weak taste buds that were immune to lemon then this dish could have scored higher but it was intensely lemon flavored. In fact it was so over-powering that it was a little challenging to eat. This would probably be a delicious dish with a little less lemon flavor. I thought it looked really good and anything with prosciutto can’t be bad… unless it was this dish.

Tuesday, April 28, 2009

77. Simplest Brined Roast Chicken


Date Cooked: April 19, 2009
Page: 307
Rating: B+

Well I am back in true form. The term simplest would imply to most people a simple dish to prepare but yet again I amaze myself with my complete lack of consistency when it comes to cooking. The recipe was a rather standard one. First off as the title implies the whole chicken was brined. I won’t go into detail but brining chicken has become a must for all my chicken cooking needs. Simply cannot be skipped (unless you are using a kosher chicken).

After the allotted time immersed in it’s salty bath I rinsed it off and patted it dry. I hate drying poultry. It is messy as I try to balance the chicken and dry it off and not contaminate the entire kitchen. No sooner do I touch the chicken than I inevitably forgot to grab something and must now was hands or spread possible salmonella bacteria everywhere. I must learn to be more prepared. Anyway once dry the chicken was coated liberally with butter, salt and pepper.

It roasts in a V-Rack on one side before being flipped to the other side. Once both sides have been exposed to cook the oven is supposed to be turned up in heat for the remainder of the cooking time. I forgot to turn up the heat. So when I took the chicken out the breast meat was cooked to the proper temperature but lets just say s the thighs might have been a bit pink… okay the juices were bright red. I cooked the chicken a bit longer before taking it out and checking the temperature again. Much better but the thighs still weren’t done to my liking so once I finished carving the chicken all the pieces spent a few more minutes in the oven just to be sure.

This is why I like brining. The chicken, even with the extra oven time, came out juicy.

Rating: B+ This rating is due to my misstep with the oven temperature. The skin could have been crispier and I am certain the thighs might have cooked better if I had had the chicken at a higher temperature. Still a good, simple, weekday meal.

Tuesday, April 14, 2009

76. Steamed Asparagus with Ginger-Hoisin Vinaigrette


Date Cooked: April 8, 2009
Page: 131
Rating: B-

We were throwing together a quick meal and needed a vegetable to accompany it. We have an abundance of asparagus it the fridge for some reason so I figured some steamed asparagus would be a nice and easy recipe to cook. It definitely was easy.


Other than steaming the asparagus, I needed to whisk together several ingredients. Before I started this project I would not have been able to just throw this dish together. I would not have had most of these ingredients in my fridge. But I am slowly beginning to increase my pantry and fridge staples, which is a truly nice feeling.


I whisked together soy sauce, hoisin sauce, canola oil, toasted sesame oil, rice vinegar and some minced ginger. I realized that I love the smell of fresh ginger. I always thought I disliked it. Not sure why. I honestly couldn’t tell you why I thought I had this hate-on for ginger. I just did. Then I took a big direct sniff of it and all the past hate melted away.


Once the ingredients were mixed they were drizzled over the asparagus and served.


Rating: B-. This was a very tough rating to decide on. I was leaning towards a C but my wife liked it. I wasn’t turned off by it, but the flavor was pronounced and I didn’t feel it was accentuated by the asparagus or that it improved the asparagus. It felt like a separate flavor entity wrapped around the asparagus flavor. Will I make this again… not as a dressing for steamed vegetables but maybe as part of a stir-fry or something.

Friday, April 10, 2009

75. French Fries


Date Cooked: April, 5, 2009
Page: 195
Rating: A-

Ever since I made the Buffalo Wings I was seriously in the market for a deep fryer. But I needed to have a good one that was easy to use and even easier to clean up. Well Canadian Tire had a sale on the T-Fal EZ Clean model and my wife and I broke down and bought it. So of course we had to break it in immediately and what else should you make but French fries.


Well this recipe was simple in theory but lengthy in first time execution. I started with potatoes… of which we had none, so I started with a trip to the closest grocery store. Inevitably, whenever I want to quickly grab something from the grocery store, that is when my son wants to come along. Regular trips to the grocery store are met with negotiations about the conditions under which he will come (he’s 5 and doesn’t accept that simply being his parents is reason enough.) While the run through the grocery store was quick, check out was a nightmare. We went through the self-checkout and every time I tried to pay, my son would sit on the scale, or grab a bag from the scale and the computer would freak-out that I was adding or taking away items. It literally took 7-8 attempts to get my son to remain motionless long enough for me to cash out. He was excited for French fries.


At home with potatoes in had I set to work. The potatoes got driven through the French fry cutter that came with the deep-fryer. That is the last time that gadget will ever see the light of day when it comes to making French fries. Thank god it came free. I can’t go into details about because I will end up rambling nonsensical crap as my blood pressure rises. If you took your dullest butter knife and then tried to cut potatoes with its handle, that would approximate its cutting efficiency.


Once the potatoes had been transformed into fry shapes I rinsed them in water to remove the excess starch and then let them soak in ice water for 30 minutes. Once bath time was over they were thoroughly dried. As they were being dried I was heating up the oil for round one. I had a lot of fries so I split them into two batches. This actually worked out well because I could cook the second batch while the first batch was resting between oil immersions.


The fries were cooked at 320°F for about 10 minutes. They were limp and yellow. The oil was heated to 375°F and the fries were cooked a second time for about 5 minutes until golden brown and crispy. The fries were laid out on paper towel and then liberally coated in salt and pepper and then served to a hungry family.


Rating: A- Everyone loved them. They turned out really nice for a first attempt at fries and I look forward to cooking them more often. The best recipe book is particular about resting times and such but with experience I think I could whip these out fairly quick. Especially since after round one you can actually freeze them.


** The vinegar in the background is from Mr. Vinegar. We picked up several bottles of flavored vinegars from them in the fall when we attended the One of a Kind show in Toronto. The spring show just finished up last weekend. I highly recommend them. I never knew how good vinegar could taste.

Thursday, April 9, 2009

74. Classic Egg Salad


Date Cooked: March 24, 2009
Page: 122
Rating: B+

I have more eggs than we can reasonably eat so I am looking for recipes in the book that use large quantities of eggs. I figured this was a good go… and it definitely used more eggs than required.

The first part of this recipe is to make hard-boiled eggs. Now most of us probably have our own timing conventions for creating the best hard-boiled egg. Well the book has its own recipe for Foolproof Hard-Boiled eggs. For the record I am now lower in status than a fool. Seems a fool could make these eggs but not I, The Mediocre Cook! You place the eggs in water and then bring to a boil. Once boiling you remove from the heat and let sit in the water for 10 minutes. After that they get 5 minutes in an ice bath before being ready to peel.

Ok, so I am supposed to peel the shells off these eggs. The book gives a nice little illustration that shows how easy it is. The shell will slip away from the egg in a nice strip attached to the thin membrane surrounding the egg. SO I gently crack the egg all over and from the air pocket in the egg I begin peeling. A huge chunk of egg breaks away still attached to the shell. Mmmm.., maybe I was too rough, let’s proceed carefully. More egg comes away with the shell before the entire thing splits with a slightly undercooked egg white spilling out from around the creamy golden yolk. I’m frustrated at this point. I have not elevated to cursing yet because my kids are within earshot but this isn’t going well. Maybe this is just one bad egg. I move on to the next one. Well before I did that I popped the yolk in my mouth. It was perfectly cooked and delicious.

Egg number two. With the care of a surgeon I gently crack the shell all over and begin to peel. The shell carefully slips away from the egg. I pause so I don’t get too excited before proceeding. A little more… then the whole egg splits and a huge chunk comes off with the shell. The same undercooked egg white interior with a creamy golden center. That yolk saw the inside of my stomach before I tossed the rest in the compost. I figured these little buggers needed some more time in the boiling water. So I placed two eggs into boiling water (to replace the two I broke). I figured that I was going to try the original method of boiling eggs. Boil them until done. As these neared completion I added the other four back into the water. Once all were done I started the process of peeling again.

The first one peeled cleaned and I was thinking happy thoughts, like I had pulled myself back from the edge of despair. The second showed similar results and I was confident that these eggs were going to work. Until I tried to peel number 3, 4, 5 and 6, These must have been the originals. They didn’t improve one bit. They were cooked on the inside better but the shell, inner membrane and egg white formed a single inseparable bond. Into the compost they went. So I have ruined 6 eggs and need to boil 4 more. This is becoming a full-time job and the only reason I was doing all this was to make sandwiches for work the next day.

Anyway the four eggs came out nicely and I was ready to move on the supposedly hard part, mixing them together. The book says to chop the eggs and then mix them with the mayonnaise, Dijon mustard, lemon juice, parsley, salt, pepper, minced celery and red onion. I chopped only the egg whites since the yolks kept sticking to the knife. I then mashed the yolks into the mixture. I liked this much better.

Rating: B+. The egg salad was good. Maybe a little runny but the flavor was really good. I remember hating egg salad sandwiches growing up as I always associated them with the food trashy people would eat. I don’t mean to offend but there was this one kid in my elementary school that brought one every day and he was filthy and always wore clothes that were dirty and absolutely didn’t match. I am not one to talk fashion but even I didn’t wear dress shirts tucked into sweat pants. Anyway, kids can be mean and I always thought of him when I saw egg salad sandwiches.

Thursday, March 26, 2009

73. Pan-Roasted Halibut Steaks


Date Cooked: February 14, 2009
Page: 505
Rating: A

Fish is not something that I cook often. I am intimidated by fish for some reason. I think part of it is that I am terrified that my house will reek of bad fish for days. The other part is that I am unfamiliar with the basic of fish preparation. So I figured if I was going to try cooking fish I should jump in with some expensive fish steaks. Let’s talk about the purchasing portion of this recipe.

The ingredients for this recipe are pretty straight-forward, halibut steaks, oil, salt and pepper. So, on a trip to the St. Lawrence Market in Toronto I decided to pick up some fresh halibut steaks. No wait… I was actually looking for fresh Tuna Steaks. After scouring the various fish market vendors and having them all tell me the exact same thing, that they were out of tuna for the day (which I have found to actually mean that they won’t pull anymore from the freezer), I started thinking of a plan B. I remembered the recipe for Halibut steaks and I figured that would be a good alternative to the tuna I was hoping to cook. So I once again made the rounds at the fish vendors, lots of filets but no steaks. Although one guy said they could cut me some to order.

I thought about it and said sure. I figured that the halibut filets were going for around 8-9 dollars a pound and I only needed two pounds for the recipe. So the fish monger pulled out this beautiful whole halibut from the ‘fresh’ stock (fresh equals defrosted recently) and slid it through the bandsaw. I always get queasy when I see industrial power tools used to handle food. Something just screams unsanitary. Anyway, as I always say, that is for the government to worry about, I’ll trust they are doing there job. In front of me he presented four lovely looking halibut steaks. And weighed them for just over two pounds, and then slapped a $60 price sticker on them. I was a tad shocked. I froze with panic and looked at my wife, she didn’t say anything and I knew this decision was on me. I was a little embarrassed to say the least. Here I am custom ordering this fish and gleefully doing so without even considering the price. Lesson has been learned. My biggest fear was less the money I had spent and more that I was going to try to cook fish for the first time with $15 dollar halibut steaks.

At home I began the dinner preparations. The fish was generously sprinkled with salt and pepper and left while the oil heated in the pan and the oven preheated for roasting. The steaks were seared in the pan for about 4 minutes and then carefully flipped and placed in the oven for about 9 minutes. The cooking times were straight from the book and I had no previous experience to base adjustments on. I didn’t know if I had thinner or thicker steaks.

Once out of the oven I plated the fish and pried the skin off carefully from around the edges and removed as many of the bones as I could. I dropped some of the Chipotle Butter with Lime and Cilantro on it and watched as it melted beautifully.

Rating: A. I was very surprised and proud on how the fish turned out. It was flaky and still moist and had great fish flavor. Halibut is a milder fish which I like and it was delicious. Will I make this again? Absolutely! Of course I will be careful to look for deals on the fish.

Monday, March 23, 2009

72. Chipotle Butter with Lime and Cilantro


Date Cooked: February 14, 2009
Page: 506
Rating: B

This was another condiment to serve with a main dish. This time the dish was going to be a fish one. I am becoming a slow convert to flavored butters and I am realizing that a simple preparation of food can be easily enhanced with a fancy condiment.

This butter was a quick mix of chipotle peppers in adobo sauce mixed with lime zest and some minced cilantro. This was my first time ever using chipotle peppers in adobo sauce and I thought I would like them. Apparently there is something about the smell that made me a little queasy… I was really concerned at first since I didn’t want to ruin perfectly expensive fish but my wife and mother-in-law both agreed it smelled fine and was actually rather nice. Seems it isn’t for me, which is sad because it’s used in several recipes in the book.

The one thing I loved about this butter though was how it melts nicely on the fish. Something very appealing about a small dollop of butter melting on hot food.

Rating: B. The way the chipotle peppers unnerved my senses is why the rating is just a B. Could have been higher without this feeling it instilled in me.

Monday, March 9, 2009

71. Pan Seared Strip Steaks


Date Cooked: February 14, 2009
Page: 388
Rating: A

Time absolutely flies by. I have been busy at work trying to accomplish everything that is required before my vacation and normally I would write up these posts during my lunch but that time has been sorely missed. Anyway I figure I should at least follow up that last post with it’s rather horrendous picture with something a little better.


Now a write up for pan-seared steaks is not really that exciting. I mean the process for cooking a steak is simple. But for all its simplicity it can lead to disastrous results. I patted the steaks dry and then seasoned them with salt and pepper. Once the pan was very hot the steak were added and allowed to cook undisturbed for a few minutes each side. Throughout the entire process though I was constantly being asked if I was over cooking them.


The steaks were set aside to rest while the pan sauce was subsequently burned and then re-done. Once the pan sauce was complete the steaks were dressed and served.


Rating: A. For some reason in my mind the only way to cook a steak was on the grill. This absolutely changed my opinion. It also made me realize that the cut of steak matters a lot towards its flavor and eating enjoyment. I will confidently prepare steaks in this manner again.

Friday, February 27, 2009

70. Shallot-Butter Pan Sauce


Date Cooked: February 14, 2009
Page: 391
Rating: B

Really quick confession. The picture is not of the product served and does not reflect the rating I gave. The above picture was of attempt one. This was a pan sauce I made for pan-seared steaks and it didn’t go as expected.


Once the steaks were done I had to cook the shallots in the same pan. Well things were hectic on this day and the pan was a little hot (it was used for searing steaks) and the recipe indicated to remove it from the heat and then cook the shallots over low heat. Well let’s just say it’s possible that I may not have turned the heat to low and immediately upon removing the steaks dumped in the shallots. They crisped up in less than 30 seconds, the pan was still a little warm. I proceeded anyway and threw in the butter which browned up nice and quick followed by lemon juice and parsley. Yes, there is fresh parsley in that sauce. You don’t have to taste it to know it was garbage.


Well I had spent a fair dollar on these steaks and I was not going to ruin them with the burnt trash I had created so I quickly minced a few more shallots and proceeded to create the pan sauce again at a lower temperature. The only problem with round two is that I didn’t have any of the browned bits left in the pan from searing the steaks. But considering the alternatives of incinerator residue or no sauce I felt this second attempt wasn’t too bad at all.


Rating: Depends on if I rate round one or two. F or B. The sauce was a nice accompaniment to the steaks but since I am a person that always orders a steak with a strong sauce (peppercorn, blue-cheese peppercorn, etc.) it was a little mild for me.

** You'll see the finished sauce in the next post
LinkWithin Related Stories Widget for Blogs