Wednesday, September 24, 2008

19. Steamed Broccoli

Date Cooked: September 21, 2008
Page: 139
Rating: B

Sorry about the picture. Sometimes there is just nothing that can be done to make the food look better, except maybe forgetting to leave the lens cap on. That would probably help this broccoli.

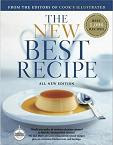
The thing about the cook book I have chosen to cook-through is that it is a basic book that teaches techniques. Not every recipe is a gourmet treat or a laborious task in mastering the culinary arts. You’ve seen me cook rice and peas and now I figured I would give the basic treatment to broccoli… the only problem with posting about steaming broccoli is that there isn’t any problem. So what do I write about?

This broccoli was steamed and then tossed with some extra-virgin olive oil, salt and pepper to taste. It tasted fine, my youngest seems to really like broccoli since he ate lots of it. As simple as it was there is always the possibility that I will mess it up but no failure this time (just an ugly photo). Next post will contain more substance. I promise.

Rating: B seems decent for something that was neither a failure nor something to brag about.

Monday, September 22, 2008

18. Thick and Chewy Chocolate Chip Cookies


Date Cooked: September 14th, 2008
Page: 777
Rating: A-

Baking is not something I do much of but I was really craving some cookies and I figured why not try some from the ‘Best’ book. I love warm chocolate chip cookies and the chewier the better so these were pretty much the top of the list. Making these was a learning experience as always and while fraught with challenges I would definitely say I am on the road to confidence when baking. So let’s begin shall we.

I had almost all of the ingredients for this in the house except for one particular minor ingredient for chocolate chip cookies, the chocolate chips. Without hesitation I zip over to the closest grocery store and grab a few bags (I figure you can never stock too much sweet baking supplies) of chocolate chips. With the goods in hand I make my way home… I’m sure you are wondering why I am bothering to tell you about my uneventful trip to the store? No reason. Just typing to pad this into a longer than needed post. At home with all the ingredients gathered I set to work.

I carefully measured out all the ingredients being sure to double check the quantities in the book. First the flour and other dry ingredients. Then I begin measuring out the ungodly amount of sugar. I love cookies but I never really realized how much sugar they actually contain. My past cookies would either come in a bag already baked or from a doughy little man called Pillsbury. Anyway as I was measuring out the sugar I realized I was not using a 1 cup dry measuring cup but a ½ cup. I just grabbed the largest assuming they were all there. These cookies may not have been sweet enough if I hadn’t caught that mistake.

I pulled out the KitchenAid and set about incorporating all the ingredients together. After adding the chocolate chips I gave the dough a few more folds manually and then got the baking sheet prepared, sheet as in the singular, I have one baking sheet so these cookies were cooking in batches. I did recently buy a Silpat though and I must say it is a very nice addition to the kitchen. At this point my son began to thoroughly clean the cookie dough from the mixer.

While potential problem number one was averted (incorrect measuring utensil), problem number 2 was lurking in the bowl. As I tried to form balls from the dough the stuff just wouldn’t stop clinging to my hands, it was impossible to work with! I reviewed the recipe but it says nothing about handling the dough. Just that I need to roll it into a ball, rip the ball in half and rejoin to give it a nice bumpy top. Hard to explain but the folks at Cook’s Illustrated do a decent job of explaining it on page 776. I added a bit more flour hoping that will help but that barely does anything. So I give up and just plop down little piles of the dough on the Silpat. The first batch goes into the oven. I figure I’ll chill the dough in the fridge while the first batch cooks.

I suppose if I had paid attention to the recipe better I would have realized the flaw in my baking process. The cookies need to cool on the baking sheet and as I was about to find out I couldn’t skip this step. Once the first batch came out I was a little puzzled. The recipe was called thick and chewy chocolate chip cookies. But these had spread out into thin and almost dinner plate sized cookies. I had six cookies taking up the entire baking sheet. I let them cool and then removed them to a wire cooling rack. Of the six cookies only four made it to the rack. My wife, oldest son and I had to do a little QA work on the cookies. They may not have been thick and chewy but they certainly were delicious and chewy.

I took the dough out of the fridge and after a short chill it was perfect for handling. I was able to roll it out into balls and perform the required ‘Best’ technique. Back in the fridge the remainder of the dough went and the baking sheet went back into the oven. 15 minutes later I had another batch of deflated cookies just as large as the last ones. I finished up the rest of the dough and set about figuring what I may have done wrong.

I’m no expert baker (pretty obvious isn’t it) but I did know that something was wrong with the ratio of fat and gluten (butter, eggs and flour). At first I figured I must have bad flour, it has been around for awhile and maybe it has absorbed too much moisture in its long storage. But then it hit me, and shame welled up inside me and I shook my head in embarrassment. I debated whether or not I should confess to what I did wrong but in the interest of full disclosure I thought I should fess up. Remember my glorious save when I realized I was measuring the sugar with the wrong measuring cup? Yeah… probably should have realized I used the same cup for the flour. Now in my defense my son was in the kitchen trying to steal chocolate chips and I was a little distracted. Aren’t I a great father, blaming my failures on my children?

Regardless of the amount of flour used though the cookies were absolutely delicious! Once cooled, they remained nice and chewy and are definitely better than anything bought at a store or premixed. But I guess anything that is predominantly butter and sugar would be good.

Rating: These deserve an A-. They were the right consistency even if they were not the requisite dimensions. Thin and chewy is a working combination for me so I can’t even classify this as a failure. Which is good for me because I was tired of failing, although I’m sure my failures are probably more entertaining?

The Next Day

They maintained the same wonderful, chewy consistency. Considering this was the day after my van got crushed by a tree these helped me through. Because nothing helps an imminent insurance headache like chewy chocolate chip cookies!

Thursday, September 18, 2008

17. Lemon Bars


Date Cooked: September 9th, 2008
Page: 817
Rating: A

My first attempt at baking from the book didn’t turn out to well. So I was a little nervous going into this recipe. But I was also excited after seeing a few recipes around for Lemon Bars on other blogs. They didn’t sound that hard but any time I see a recipe for any type of dough I freeze up with anxiety, so few ingredients yet so many ways to make it fail. As other people have pointed out, baking is more about science than cooking is. The manner in which the ingredients work together is very important. When making Biscotti I had no real understanding of this. Going into the lemon bars I was acutely aware of the possibility for failure. So with a little fear I began.


The first step was to make the crust. Carefully I measured out the dry ingredients and double checked the quantities and pulsed them together into the food processor. At this point I decided I may invest in a new food processor. The first time I pressed pulse a small cloud of flour puffed out from the lid. The processor I have is designed so that when you are slicing vegetables with it you can jettison (I love that word) them out the side into a bowl instead of keeping them in the processor bowl. Great for large quantities but I’ll admit a feature I have never used. So anyway, every time I hit pulse I would get a little of the flour mix everywhere. I struggled to get the lid gate to form a better seal but this just wasn’t working to well. I finally gave up and resigned myself to spending more time cleaning up.


Once the dry ingredients were mixed I added the butter. I cut the stick up into smaller pieces and distributed them throughout the dry ingredients before a couple more pulses to mix. This is where I am sure experience in baking comes in handy. Every baking recipe uses the descriptor, coarse meal, to describe when to stop mixing. I couldn’t tell if I had reached that point. So I did what anyone should do. I stuck my hands into the mix. I had turned off and unplugged the processor before doing this of course. You can learn from a lot of mistakes but I try to limit learning from personal safety mistakes. I don’t know how to describe the dough other than it felt right. It was smooth and fluffy and felt pretty much like the dry ingredients but would compress easily into form due to the butter. I work it just a little since I had read many stories about overworked dough. I dumped the mixture into the pan and compressed it to form a firm crust, then into the fridge for 30 minutes to chill before 20 minutes in the oven to turn it a golden brown. It never reached golden brown and this concerned me. I figured I would leave it just a little longer and then take it out regardless.


While the crust was chilling and baking I was getting the filling made. This was pretty simple other than the time it took to juice and zest the lemons. The zester I have is pretty basic and definitely not very sharp. It took a fair bit of work to obtain a ¼ cup of zest and for all the effort I was rewarded with some zested knuckles (don’t worry, I wasn’t adding that to the recipe). Juicing was much easier. We have an electric citrus juicer that was given as a wedding gift six years ago and we used it a fair bit in the early days. It made very quick work of the lemons. I ended up putting the pulpy juice through a fine mesh strainer but next time I don’t think I will since you strain it later in the process. Plus the added pulp could only provide more flavor.


The ingredients were all mixed together and then put on the stovetop to cook until thickened. It says to stir constantly until it begins to thicken and reaches a suitable internal temperature. The ‘Best’ book says about 5 minutes after almost 10 minutes of constant stirring it wasn’t really thickening. I turned away from the stove for 10 seconds, just 10 seconds, and it immediately clumped. I aggressively stirred it to smooth it out and removed it from the heat. At this point you strain it before pouring it over the hot crust. Then it goes into the oven for about 10-15 minutes. Oh wait… I forgot to add the cream to the lemon filling. I was pissed while my wife calmly informs me to just take it out, scrape the filling off and mix the cream and re-pour. Can you do that? I figured why not, my wife is usually right as she often reminds me. So I carefully remove the filling, add the cream and give it a quick fold into the mixture and spread it back over the crust. Back in the oven and I cross my fingers.


You know what? Katt was right. It turned out fine. And these were also the best lemon bars I have ever tasted. The filling was tart and full of lemon flavor but still sweet and it set beautifully. The crust was firm and had a texture almost like a cookie. It wasn’t rock hard like my last baking experiment and it held together beautifully. It didn’t crumble when being bitten, it snapped gently. Okay I was proud of myself. I will be making these again.


Rating: These tasted awesome and turned out beautifully. They deserve nothing less than an A
.

Tuesday, September 16, 2008

16. Buttered Peas


Date Cooked: September 9th, 2008
Page: 172
Rating: C

Okay everyone. Hold on for another exciting recipe! This one combines the great flavors of peas with salt and butter. Exciting wouldn’t you say!

This is a pretty weak recipe entry from the book but it was more of a technique learning experience. I’m not sure if this is a technique that should be used. Basically you sauté frozen peas in a pan with butter and serve warm. Yes, the book recommends frozen. I don’t want to say it was a horrible failure but man I need to stop learning from mistakes. I need to start learning from success!

So this is the failure part. I was boiling water for pasta and decided to use the same burner. I forgot to turn the burner down so when the peas hit the melted butter they exploded like firecrackers. I had pea shrapnel all over the stove. I quickly removed them from the heat and turned the burner down but the damage had been done, little crispy peas. Now I won’t lay all the blame on the stovetop temperature. The fact that these peas sat in my freezer for a long time certainly didn’t help. They had developed a woody texture that no amount of butter was going to soften.

Anyway, I’ll go back to steaming my peas or boiling them in a little water.

Rating: C, simply because it would have been easier to steam them and they would probably have tasted better. Maybe I’ll try this method again with a newer bag of peas and a little more attention to detail.

On a completely non-food related topic, mother nature Sunday night decided to deal a vicious blow to my minivan by pushing a 40 year old maple onto it. At least she was nice enough to spare my house and the car that should have been crushed. I might not be attempting as many failures in the coming weeks.

Sunday, September 14, 2008

15. Grilled Corn


Date Cooked: September 7th, 2008
Page: 157
Rating: A-

Grilled corn, where should I begin? I’ve already prepared corn on the grill several times this summer but I will admit I am new to grilling corn. My brother-in-law mentioned how much he enjoyed it that way, so I figured why not give it a go. I’ll run through the various learning highlights.

The first attempt prior to this project was just throwing the whole cob on the grill with husk and silk intact. This was fun as the husk blackened and fine wisps of ash and charred silk wafted all around covering everything in close proximity to the grill. It was even more fun when the corn was done and I had to peel these crumbling charred messes. In this paragraph you can interchangeably use ‘fun’ and ‘horrible’. The corn though was amazing!

The next attempt came at the instruction of the book where all but the inner layer of husk was removed and the silk was trimmed. This had a better roasted flavor to the corn, especially where the corn kernels were exposed to the grill and developed as nice deep brown color. I really liked the darkened kernels.

So for this latest attempt I went with the same instructions as the book but cooked the corn a little longer. Amazing! I love the blackened kernels. They practically burst with flavor (and a few actually did burst) as the sweet flavor concentrated as the water evaporated. I really wish corn wasn’t going out of season.

The corn was served with the lime-cilantro butter and it was good. The sweet corn paired nicely with the butter. I am a fan of grilled corn and I can’t imagine going back to boiled corn on the cob. Of course I have to simply because there is a recipe for boiled corn on the cob. Maybe I’ll boil it, snap some photos and then toss it on the grill!

I have seen several mentions lately of soaking the corn in water before grilling it. I assume this probably cuts down on the charring of the husk before it is completely cooked. I may try this in the future since husking charred corn is not a character building task. It’s just plain horrible.

Rating: This dish gets an A- since it is now my benchmark for all future corn recipes. I love grilled corn.

14. Lime-Cilantro Butter

Date Cooked: September 7th, 2008
Page: 156
Rating: B-

We were having what is seeming to be a traditional Sunday feast and we were going to be putting some corn on the grill (next post). I quickly skimmed through the book to see what I could add to the menu and realized there were several compound butter recipes alongside the corn entries. I figured sounds like a good plan! This was extremely simple to put together that I am sure I could train a monkey to do it. Of course finding the monkey would be the hard part so maybe I can get my son more involved by training him. He’ll be proud to know he beat out a monkey for my sous-chef position. The recipe is simply some finely chopped cilantro, lime zest and juice and a bit of cayenne pepper folded into softened butter. But for all its simplicity it did raise a few questions.

I froze my cilantro to cryogenically extend it ‘freshness’. Freezing some herbs is worthless. I have frozen Basil and mint and they work great (more durable leaves). The cilantro just thawed into a wilted soggy lump. It was grossly unappealing. Still smelled and tasted fine though.

The ‘Best’ book practically denies the existence of salted butter. I’m slowly coming around to unsalted butter for baking and cooking but as an actual condiment salted is the way to go. Unsalted butter is pretty flavorless and I found myself using more salt on my corn than I would normally use. After all these many years of loving butter I realize it is the glorious marriage of salt and butter that I love. So now I will be stocking both in my fridge.

Rating: I think I may start rating the recipes. Or I guess more accurately, rating my ability to deliver a palatable product that I enjoyed eating. This dish gets a B-. It could have been higher if I had used salted butter and fresh (not frozen) cilantro.

Thursday, September 11, 2008

13. Garlic-Lemon Green Beans with Toasted Bread Crumbs

Date Cooked: September 5th, 2008
Page: 136

There is a lovely lady at work that has a massive garden that produces more vegetables than her family wants to eats. So every once and awhile she brings in bags of tomatoes, basil, cucumbers, green peppers and a host of other things. Up until now I haven’t taken too much since I always felt it would most likely sit in my fridge and go bad. Plus as we will surely find out in future posts, items like tomatoes are low on my list of vegetables I enthusiastically consume. This day however, my co-worker brought in a box full of beans. The beans were a mix of yellow and burgundy beans and I thought the color of the burgundy beans was amazing. So I snagged a few with the intention of cooking a bean dish for dinner. Well… I grabbed more than a few. I grabbed almost all of them.

After making off with my stash of beans I needed a few more so I stopped by the grocery store on the way home. I grabbed some really vibrant looking green beans and had these visions of a nice colorful dish of green, yellow and burgundy beans. Yeah… that wasn’t quite what I got but we’ll discuss that shortly.

The first step to this recipe was to toast some bread crumbs. I was torn between sending some fresh bread slices for a hellish ride through the food processor or just opening the container of bread crumbs I already had on hand. It was a tough decision. The food processor is a pain to clean but the pre-packaged bread crumbs I had on hand weren’t exactly… umm… fresh. The bread was no match for the metal blades of the processor. Into a hot skillet the crumbs went with some butter for a few minutes and then I set them aside in a bowl with some salt, pepper and Parmesan. With that completed it was time to cook up the beans.

In the same skillet with some more butter I sautéed some garlic before adding some red pepper flakes, flour and thyme. Once quickly mixed I added the trimmed beans. I tossed the beans to coat them and then added chicken broth. I covered them and let them cook until almost tender before uncovering them to thicken the sauce. This is where I learned that burgundy beans are just pretty little green beans in a different temporary package. Within minutes of being added to the heat my lovely dark burgundy beans faded to just plain looking green beans. I couldn’t tell the difference when looking at them which disheartened me a little since I didn’t take a before picture. The grocery store probably sells them for triple price. I guess it’s good they were free.

Just before serving I added lemon juice and then topped them with bread crumbs on the plate. I liked this dish a lot and had more than a single helping of them. One thing I did notice is that although I couldn’t visually tell the difference between the regular green beans and the ones that started out a deep burgundy, there was a textural and taste difference. The burgundy beans were softer and had a taste that reminded me a little of canned beans. They weren’t bad at all but just didn’t taste as fresh (even though they were fresher).

I felt better after finishing this dish considering my last two failures. I would definitely prepare beans this way again in the future. They were pretty simple and full of flavor. I might use prepackaged bread crumbs though since messing around with the food processor was more headache than it was worth.


Wednesday, September 10, 2008

12. Grilled Hamburgers with Blue-Cheese


Date Cooked: September 5th, 2008
Page: 448

I really wanted to use the grill and I wanted something simple to put together so I figured what could be easier than hamburgers. The ‘Best’ book is pretty simple with regards to hamburgers. Ground beef, salt and pepper, that’s it. I kept thinking there needed to be more but the book really emphasizes the quality of the ground beef and from which cut of beef it is ground from. I of course didn’t heed this information because I already had extra-lean ground sirloin thawed in the fridge. Wow, I won’t make that mistake ever again.

There was a variation in the book for adding blue-cheese and since we still had some (got to love Costco), I mixed it in with the ground beef and seasonings. The ‘Best’ book has this wonderful method for forming the patties and for pressing a divot in the middle to help them cook evenly. I tossed them on my nice hot grill and listened to the beautiful sound of the meat searing on the metal grills. I paid very careful attention to the cooking times recommended and made sure not to press the burgers to keep them juicy. They cooked up nicely and looked great. I brought them inside to serve up with the rest of the meal.

After dressing the burger the way I like (which is pretty minimal), I took my first bite. I was expecting a nice juicy flavorful burger. What I got was a flavor and texture akin to pressed cardboard. The only flavor was in the second bite when I got a nice chunk of blue cheese. I’ll be honest, these were downright horrible. I can only assume that they were dry because the ground beef was extra-lean. The ‘Best’ book recommends a meat mixture with a fat content that puts it between regular and lean. It also recommends the use of ground chuck since it is a more flavorful cut. In fact it specifically states that sirloin produces a bland burger. But I figured their bland might still be decent. I won’t assume I know what I’m doing. I’ll heed these instructions in the future.

So my past two attempts from the ‘Best’ book have been dismal. Let’s see if I do better with the next one.

Tuesday, September 9, 2008

11. Lemon-Anise Biscotti - Sweet Rocks


Date Cooked: September 4th, 2008
Recipe: 11
Page: 804

Up until this point I thought I had been making progress. This time though I barely earned my moniker of the Mediocre Cook. I was probably closer to the Unfathomably Bad Baker. I had seen several biscotti recipes recently on food blogs, most recently by Cecil at FoodCraze. I was really craving them and wanted to try and make some. There are three recipes for them in the ‘Best’ book and I figured the Lemon-Anise ones sounded tasty and reasonably simple. After re-reading the recipe they still are reasonably simple but yet I managed to f--- this one up pretty good. This is my story.

I made the trip home from work and was in a reasonably good mood and as usual for the past few weeks I was thinking about what recipe to try tonight. I was also thinking I need to start planning out the meals and recipes better so I can make more efficient use of my time and ingredients which would cut down on travelling to the grocery stores every day which is becoming a habit. Ok, so I get home and decide that regardless of what I eat for dinner I was going to make biscotti. Dinner was a simple one dish casserole that was quick to throw together allowing me ample time to play with this biscotti recipe.

The first hurdle to this impending disaster that I had to overcome was that I did not have a zester. I considered using a cheese grater but considering the size of the lemons I had, which were small, a single pass on the grater would have cut through to the pulp. In other words I would have had all mess and no zest. So in a moment of desperation I grabbed the peeler and my chef’s knife. Have I mentioned my knives yet? With peeler in hand I undressed the lemon and minced the crap out of the peelings. Turned out not too bad and the lemon aroma was nice. This was the hardest part of making the biscotti if you can believe. So how could I have gone so wrong? Let’s continue.

I added all the dry ingredients to one bowl and whisked eggs, sugar, anise seed and the lemon zest in another. Slowly mixing in the dry ingredients I combined the two and folded until I had a batter. But something was terribly wrong. This batter was pretty dry and wouldn’t hold together very well. The directions say to stretch it out into long rolls about 13 x 2 and place them on the baking sheet. How can I put this… stretching the batter was like trying to shape playdough… that was left uncovered… for a week. I struggled to mold this mess into some kind of log shape and press it down to give it that biscotti look. I gave up and threw it in the oven while doing a mental calculation of how much money I wasted on this dish. I figure less than three dollars.

I went back to the recipe to figure out where I went wrong. It was very obvious. Two biscotti recipes are found on page 804 of the ‘Best’ book. One calls for more flour, and it wasn’t the one I was making. But apparently that didn’t stop me from using the greater amount in my recipe.

The aroma wafting out from the kitchen was pleasant and I started thinking there was some hope for salvaging the biscotti. So, when the first bake time was up, I took it out to cool before slicing it up for round two in the oven. When cooled these things were rigid and the crust on them was hard. I wasn’t sure my knives were up for the task of slicing this. I had to bear down on these pretty hard to get the first knife stroke to score the surface and begin cutting through. I felt like a lumberjack as I sawed through these mini logs. I was supposed to cut the biscotti loaf on more of a diagonal but for some reason they didn’t turn out that way. I think the loaf was too narrow and didn’t spread out any during baking.

I placed the mini bricks on the baking sheet for their last tour of duty in the oven. I was a little hesitant about this step since these things were already close to rock solid but I went with what I was told. And those pieces of biscotti went from almost rock solid to industrial strength building material.

When I went to take my first bite of the finished product I had to maneuver it to the side of my mouth so I could actually use my molars to break a piece off. When the biscotti cracked my heart skipped as I believed my tooth had given way to the unyielding biscotti brick. Of course for all the textural problems they had, the flavor was really nice.

Most people who have tried them politely tell me biscotti are supposed to be hard and that they taste great. I usually only watch them struggle through one piece. At least my five year old son was honest. He asked me if I was playing a trick on him and was trying to get him to eat a rock. I was laughing when I told him ‘no’ so I don’t know if he believed me. He didn’t finish it.

So I have a handful of these things left and I’m either going to use them to repair some of the brickwork on my house or eat them myself. Will I make these again? Probably not, but only because I have two more biscotti recipes to try from the ‘Best’ book. I’ll be very careful about ingredient measurements for the next time though.

Monday, September 8, 2008

10. Stir-Fried Pork, Eggplant and Onions with Garlic and Black Pepper


Date Cooked: September 2nd, 2008
Recipe: 10
Page: 471

I would like to apologize for the quality of the photo. I had just finished creating this masterpiece when I realized the camera was not in the house. So I had to scramble for any electronic device I could find with decent photo taking capability. Katt’s phone was at hand so I snapped a few photos as best I could.

I was really mixed about doing this dish. I’ve only had eggplant once before and was not a fan of its preparation back then. I found the texture questionable and the taste mild but not really pleasant. I wanted to give it another go plus I had this lone eggplant sitting in my fridge from my sister-in-laws last visit. I grabbed the new knives and set to work cubing the eggplant. I love my knives.

I grabbed the pork tenderloin from the freezer where it was having a nice little rest to firm up for slicing and I took the knife to it and sliced it into beautiful medallions. I love my knives. How did I ever function in a kitchen before? I think I know why I didn’t really cook previously. I had crappy tools.

The pork was first up as I fired it in a little oil for a few minutes to brown it up nicely. At this point I couldn’t help but steal a few pieces… you know, to ensure they were fully cooked. I put cooked pork aside (but still close by so I could ensure the little nuggets of pork goodness weren’t going bad with some frequent tasting) and dropped the eggplant into the pan with a little more oil. These bad boys started browning up nicely and took on a firmer texture. When the eggplant was done I set them aside with the pork. This was the final go/no-go point in the meal. If I didn’t want the eggplant I would have to jettison it now. The smells in the kitchen and the nice looking brown crisp they had started to form convinced me to give them a chance. Next up was the onions. I chose a sweet Vidalia onion for this since it was a main component of the dish. These were sautéed until tender and starting to caramelize.

Then came the fun. The recipe calls for something like nine cloves of garlic and two teaspoon of black pepper to be mixed together and then sautéed in the pan until fragrant. I was supposed to sauté until it was brown. It was black. How do you tell when a black paste has browned? Anyway when the kitchen smelled strongly of garlic and pepper I considered it done and then threw everything back into the pan with the sauce to coat. A few tosses of the ingredients and it was complete.

I served the stir-fry over some white rice and sprinkled it with some fresh cilantro. Ever since I have begun cooking rice on the stovetop in a frying pan, I have played with the amount of toasting I do to the rice before adding the water. This time I toasted it a little longer than called for and really liked it that way.

I was really surprised by this meal, both in how well everything came together, and the taste. The pork was succulent and the eggplant was actually pretty good, mild in flavor but definitely noticeable. I must remember to add less cilantro to my dish next time (or chop it finer) since I was not a fan of its texture difference from the rest of the dish (although I loved the fragrance it provided).

Recipe number 10... The book boasts 1000 recipes so I guess that would make me officially 1% complete.

Friday, September 5, 2008

09. Buttermilk Waffles


Date Cooked: September 1st, 2008
Recipe: 9
Page: 651

It was Labor Day morning and I wanted something different for breakfast. Considering I rarely eat breakfast (yeah, yeah I know how important the first meal of the day is), just having food would be different. Flipping through the ‘Best’ book I was looking for ideas and I wanted something a little more substantial to post about other than fried eggs or bacon, since the past few blog posts haven’t exactly been… complex. I stopped at page and read the entry for Buttermilk Waffles. I had buttermilk in my fridge from a few other recipes and figured it would be a great chance to use some more since I am not one of those people that can drink a glass of buttermilk… ughh!


So I dug out the waffle maker. Then I spent several minutes cleaning off the layers of dust that had adhered to it. I think we’ve owned this for almost six years and I can honestly say this was the third time it was used. I hope we bought it for a good deal. I would say the only other appliance I have that sees even less use would be the juicer, but we haven’t had that for a year yet so it might still see more use.


So I begin to mix all the ingredients together as directed and then comes the part where I need to whip the egg whites. Into the KitchenAid mixer they go and we watch hopelessly as the whisk attachment spins helplessly above the egg whites. We add more egg whites with no luck. Then I finally remove the bowl and hold it a mere fraction of an inch higher so the mixer can work its magic. I think I was supposed to stop at soft peaks but since I had never actually whipped egg whites before and I had no idea what soft peaks should look like, I think we stopped somewhere between hard peaks and molding clay. If I had seen this video earlier I would have been better informed. The clay got folded into the batter.


So onto the hot waffle iron I scoop some batter. I think I overestimated how much batter was needed because once I closed the lid it started pouring out all sides. The only comment Katt had for me was that I would be cleaning up the mess. In the end the waffles turned out pretty good. It will probably be awhile before I make these again because there is a fair bit of work involved. Also, I personally found them a bit salty. I ended up with a fair amount of powdered sugar and syrup on mine. My son really liked them though so that was a bonus.


The waffle iron was carefully tucked back into its corner where it will probably sit for another two years.


I would like to take this moment to profess my love for my wife Katt. Over the weekend she decided to treat me to an absolutely fantastic gift, a set of Henckel’s Knives! I had picked up a Boos Cutting Board while on vacation (the large 2ft model) and for the next few days I had been eyeing the knives in every kitchen department or kitchen supply store I could find. We were at the Bay when my wife disappeared for a few moments and the next thing I know she is handing me a bag with the knives in it and big smile on her face, although seconds later I’m sure my smile was bigger!


So to end this post. I am very excited to begin cooking with my new fabulous knives! Next on the list of must haves; La Creuset 7 ¼ qt. Round Dutch Oven (Slate) (Price at Williams-Sonoma in Buffalo, $260 USD, in Toronto, $350 CDN). I might be smuggling this one from across the border.


P.S. Yes that is a picture of one of the new knives in my title.

Thursday, September 4, 2008

08. Creamy Garlic Vinaigrette


Date Cooked: August 31, 2008
Recipe: 8
Page: 83

Ok, Ok… I can hear the groans now and those few readers I have are probably already trying to click to some other blog. But I have an excuse. We were on vacation and I didn’t feel like going grocery shopping so we used what we had in the house, which meant the last of the salad greens before they began to wilt into a slimy mess.

Salad dressings and vinaigrettes are quick and easy to make so they were perfect candidates for fulfilling my cook-through project while under time constraints and limited fresh items. The vinaigrette recipe suggested using a jar to mix the ingredients in. I was trying to remember where I had stored the mason jars we bought several months ago, when we thought we would try to make preserves (yeah that never quite happened), when I remembered I had a single jar in the cupboard that was from some gift basket thing and since I am a pack rat of sorts I washed it thinking it could one day be useful. That was an absolutely atrocious sentence. I apologize for anyone that needed to waste time trying to read through that more than once. Anyway, the jar, so I filled it with the simple list of ingredients (garlic, oil, sour cream, salt, pepper, lemon juice, and vinegar), gave it a vigorous shake and was done.

My wife loved this vinaigrette and I am told I will be making it more often.

Tuesday, September 2, 2008

07. White Rice


Date Cooked: August 24, 2008
Recipe: 7
Page: 209

At this point I should probably start apologizing to the five of you that might read this blog. I can’t say I have been tackling very difficult recipes and part of me has trouble calling several of these last few posts ‘recipes’. In fact I would say the selection of white rice as a recipe stretches the definition. I will say one thing though. I will never prepare minute rice again… at least not if I have the time to make real rice.
This method of preparing rice doesn’t do the whole boil in a saucepan until the top is mushy and the bottom has hardened into cement. Last time I made rice on the stove top, I threw the pot out, so let’s just say that minute rice was a much cheaper alternative. That was until I decided to try the ‘Best’ recipe.

The rice was prepared in a large saucepan by sautéing the uncooked rice in a little oil. This brings out the nutty flavor of the rice and I must say I didn’t think white rice had much of an aroma. Next, water was added and brought to a boil and then covered and left to simmer, and then finally with the heat turned off left to rest. I probably wouldn’t have left the rice to rest as long as I did since it was a little dry but it had so much more flavor than the leading instant rice brand. The rice was actually a flavorful accompaniment to the meal as opposed to ‘filler’. I was truly missing out all these years.

Hopefully soon I will actually prepare some really meals from the ‘Best’ book.

Monday, September 1, 2008

06. Blue Cheese Dressing


Date Cooked: August 28, 2008
Recipe: 6
Page: 80

It was this dressing that prompted the torture of manually whisking oil and egg into mayonnaise. I felt like a salad since we were leaving for small vacation for the labour day weekend and I didn’t want to come home to a fridge full of less than fresh leftovers. A simple salad was my choice and I felt that throwing together a homemade dressing for it would be nice. With some blue cheese sitting in the fridge I felt this was an opportune time to utilize the ‘Best’ book. It had a simple blue cheese dressing recipe so I dove in… only to realize I was out of mayonnaise. So I figured I could just make my own (see previous post). I’ll be sure to stock my fridge better in the future.

Nothing could be easier than mashing the buttermilk and blue cheese together and then mixing in the rest of the ingredients. At first when I tasted the dressing I was a little concerned. The blue cheese was muted and overall I wasn’t too enthusiastic. I covered it and put it in the fridge for about an hour as we finished a few other things around the house. When it was time to eat I was really excited about the dressing… that was until I took my first bite! While resting in the fridge the flavors had a chance to meld and the sharp flavor of the blue cheese came through bold but without over-powering the dressing. It was delicious!

Reflecting back on this dressing I will definitely make it again the next time I have some blue cheese. I’m not sure the worth of homemade mayonnaise in it but next time I make it I’ll see if off the shelf mayonnaise impacts the flavor.

The Next Day
Well technically this was a few days later but I still had a little bit left over so I threw a quick salad together to finish it off. This dressing just kept getting better with age!

Friday, August 29, 2008

05. Mayonnaise


Date Cooked: August 28, 2008
Recipe: 5
Page: 76

There were a few reasons why I decided to torture myself today. I say torture because I can’t think of too many other ways to describe the process of making mayonnaise by hand. The first reason is that I am going to be away for a few days and I didn’t want to do anything that would leave me with a ton of leftovers. The second reason is that I want to start eating more salads so I have been looking though the salads section of the ‘Best’ book.

I actually didn’t select mayonnaise first. I had decided to make a salad dressing which you will see in a later post and one of the ingredients for the salad dressing was mayonnaise. I didn’t have any mayo in the house but I did have the ingredients for making it from scratch. Now in the ‘Best’ book they have several versions of mayonnaise but I decided on the plain one since it was going to be used as a base for the salad dressing. They also have the option of doing it by hand or using a food processor. The food processor version doubles the recipe and uses whole eggs instead of just the yolk. I was curious as to the difference in egg usage considering the only real difference to the recipe was the use of the food processor. After whisking by hand I can only assume no human can reach the whisking speed required to emulsify oil into a whole egg. Why did I try to whisk by hand? I thought it would be fun…

I think my entire arm seized up after the first 3rd of oil had been added. My brain could not actually coordinate my arm to move in a natural manner. I knew I wanted to whisk vigorously but my arm and brain had decided now was a time to have a little family spat. I took a momentary pause to help smooth over the brain/arm relationship and once both parties had come to an agreement I went back to whisking, this time following the agreed upon terms and proceeding a little slower. Surprisingly the mixture started to thicken up and soon I had a beautiful, yellow, creamy... mayonnaise?

It turned out pretty good. Would I make this again from scratch? Probably, but I would reserve it for occasions when mayonnaise needed to be spotlighted. I would definitely like to try some of the other variations since the addition of spices and herbs could make for a plethora of tasty options. Of course next time I will try the food processor. Might be easier.

Thursday, August 28, 2008

(OOS) Poppin' Fresh Barbecups - The Day Just Isn't Long Enough


Date Cooked: August 27, 2008
Source: Taste and Tell

Okay so these don’t come from one of my official sources, but right now I am on a blogging high and feel the need to post everything. Originally I was planning on cooking some Gumbo because I’m craving something spicy and I had never had gumbo before. Unfortunately things just didn’t flow smoothly after work and by the time I was able to hit the grocery store to grab the final few ingredients it was getting pretty late. So I needed to figure something out for dinner. I still had this image of these in my mind from earlier in the day and it seemed like the perfect time to throw something quick together. I’ll be honest, this would be the second recipe that Deb has done that I’ve now attempted. The first was the meat loaf.

I used ground pork and veal because I had some leftover in my freezer and I wanted to use it up. The barbeque sauce I had in the fridge was already pretty sweet so I did reduce the amount of sugar (even then they were still a little sweet). My little mistake though was the amount of cheese. The original recipe calls for a sprinkle of cheese (1/2 cup) for all the cups. I misread the recipe and used 2 ½ cups of cheese. I was laughing to my wife when adding the cheese marveling at what some people refer to as a sprinkle. Apparently I was laughing at myself. But I don’t think there has ever really been a time when I thought less cheese would be good and this was no exception!

They came out of the oven smelling great and were definitely filling. I thoroughly enjoyed more than my fair share of them.

Poppin' Fresh Barbecups
adapted from Taste and Tell
  • ½ lb. lean ground pork
  • ½ lb. lean ground veal
  • ½ cup barbecue sauce
  • ¼ cup chopped onions
  • 1 tablespoon brown sugar
  • 1 can Pillsbury Flaky Rolls
  • 2 ½ cups shredded cheese (marble cheddar)
Pre-heat the oven to 400°F. In a skillet, brown the ground meat and drain. Add the onions, sugar and barbeque sauce and heat through for a few minutes.

Seperate the dough into 10 pieces and place each piece into the cup of a greased muffin tray. Press and shape the dough to line the cup. Place about 1/4 cup of the meat mixture into each dough-lined cup. Sprinkle each with cheese.

Bake at 400°F for about 10 minutes. Let stand for 1 minute; remove from muffin cups
.

Wednesday, August 27, 2008

Thai Green Curry with Chicken, Broccoli and Mushrooms (Supplemental Recipe #2) - Drowning in Deliciousness!


Date Cooked: August 24, 2008

My wife has been a big supporter of my newest little project and she had requested that I make a Thai curry of some sort so I looked through the ‘Best’ book and unfortunately there were no Thai curries to be found. But The Best Soups & Stews did contain recipes for several variations of both red and green curry. So we settled on a green chicken curry simply because we had chicken in the fridge which needed to be used.

I was faced with a decision as to whether or not I should try to make my own curry paste. In the end I decided that if I liked the dish enough I would consider making it in the future, but for now I would just use store bought green curry paste which wasn’t too difficult to find. So armed with the many ingredients required for this recipe I dove in.

If I had been preparing this dish two weeks ago I would have just dumped everything together, cooked it and called the meal complete. That was the old me, uninspired, clueless and let’s face it, probably a little lazy. But since I decided to start this project I was determined to make changes to the way I approach cooking and food. One thing I have learned in the handful of dishes I’ve prepared so far is that I am slow and unorganized, starting before having everything ready. I have already begun to improve in this regards. Gone are the days of burning the chicken while I look for a clean knife to cut the vegetables. Gone are the days when I discover I am out of eggs after mixing the other ingredients together. Then I found out the broccoli florets I had in the freezer weren’t florets.

The recipe begins by reducing the green curry paste and some of the thicker/solid coconut milk until it separates into solids and oil and I must say this is a rather fragrant state and surprising since the smell of green curry paste by itself is not exactly pleasant to me. Add to this the rest of the coconut milk, fish sauce and sugar and simmer till the flavors meld. The aroma in my kitchen was fantastic! The chicken was added and allowed to cook for a few minutes before adding the mushrooms and broccoli. After a few more minutes in went the red peppers and hot Thai chili peppers.

As I seeded the hot peppers the only thought going through my mind was that it would probably be a bad day to decide to put my contact lenses in. What was truly absurd though was I had almost involuntarily rubbed my eyes. Not sure why I was about to do that but I can assure you that would have been a disaster.

Once the Thai curry was done I removed it from the heat and added the fresh basil, mint and lemon juice and wow! The smell was amazing! I don’t normally cook with fresh herbs mostly because the frequency with which they get used usually means they end up in the garbage before I get around to using them again but I must say after that fragrant experience I will make an effort to use them more often.

So after the dish was completed and the pictures taken I decided to have a bowl of it just by itself. I took the bowl out to our deck where Katt was busy mowing the lawn to allow her a chance to taste this dish (after all she requested it). As I called her name a little fly decided that the smell was just too amazing and like the kamikaze pilots of WWII Japan, he dove head first into my bowl of hot Thai green curry and with a pathetic little flutter promptly submerged and drowned. I’m pretty sure the look of disbelief on my face overshadowed the slight revulsion, but at least I knew my Thai Green Curry with Chicken, Broccoli and Mushrooms was worth dying for.

The Next Day

I brought a monster sized bowl of this for lunch at work the next day and it just didn’t have the same effect. The flavors had melded together too much and it had a milder uniform flavor. The fresh and truly enticing aroma of the mint, basil and lime juice was now blended into the rest of the dish. It was filling but definitely not very exciting.


Tuesday, August 26, 2008

04. Pita Chips - A Second Place Side

Date Cooked: August 23, 2008
Recipe: 4
Page: 16

When I made the last batch of hummus I wanted to try my hand at the pita chips that the ‘Best’ book suggested. These pita chips couldn’t have been easier to make… well actually they could have. You need to brush oil on each cut slice, I hate brushing oil on things… especially when those things are several dozen cut pita slices. When I made the second batch I just spread oil on the full pita round before slicing them. Much quicker so I’m not sure why the recipe indicates cutting them first. With a sprinkle of salt these spent 10-12 minutes relaxing in the oven earning them a nice golden tan. They ended up crispy without the sometimes dried burnt flavor toasted bread products can get. These paired wonderfully with the hummus I had made.


While the pita chips were easy to make, I’m not sure how often I would make these. Currently I enjoy grilled naan for serving with my hummus so the pitas are a measly second place choice. Although while I sit here and type this I am actually thinking these pita chips sprinkled with a little cayenne or some other simple spices would probably be pretty awesome. Maybe I will try these again soon after all.

Sunday, August 24, 2008

01. Hummus - Where It All Began


Date Cooked: August 23, 2008
Recipe: 1
Page: 13

So this is the recipe that started it all. Back on that fateful day in the grocery store when I defied the corporate man and decided to spend my money making fresh hummus instead of buying a prepackaged container I’m sure they all just smiled. I was going to spend more money buying the ingredients to make the hummus than I would have if I had just bought the single container. Of course this doesn’t take into consideration the numerous batches of hummus I would be able to make from these ingredients so I win in the end!

The only difficulty I had in getting the ingredients for this recipe was finding the tahini, which is essentially ground sesame seeds, nothing else. I hit several large supermarkets until I eventually found it. In the past few weeks I have definitely discovered the stores in my area that carry the non-standard ingredients… I call them non-standard but considering the ethnic diversity of my community they are actually pretty standard. I’m just learning to open my eyes and look.

Hummus is really easy to make if you have a food processor and I was really surprised at both how good it turned out for a first attempt and how quick it is to make. I think I spend more time getting the food processor out and then cleaned up and put away than it takes to actually make. Well this would be true if I hadn’t discovered how to make it a truly smooth texture.

The ‘Best’ recipe makes mention that after rinsing the chick peas and towel drying them some lose their ‘skin’ making for a smoother hummus. Well I have found that if I take this to the extreme and remove the skin from each bean then I get a very smooth texture. Apparently I don’t have enough to do in the course of a day that peeling chick peas is an acceptable practice. But the results are worth it, a creamy dip without the slightly fibrous texture of the chick pea skin.

Since my first attempt at making hummus I have begun to deviate away from the ‘Best’ recipe. I have found that I like a spicier hummus with a little more garlic in it. A pinch in the ‘Best’ recipe usually translates into a half teaspoon or more.

I will continue to make hummus frequently. I always enjoyed it as a light dip and only ate it during family gatherings or social events, now I can enjoy it whenever I feel like peeling several hundred individual chick peas.

Wednesday, August 20, 2008

03. Meat Loaf with Brown Sugar-Ketchup Glaze - What Is That A Ham?


Date Cooked: August 20, 2008
Recipe: 3
Page: 451

I’ve been wanting to cook this long before I even considered this blog (and since this blog is only a few days old that statement carries very little significance). Everywhere I looked I found a story of someone despising the meat loaf of their youth. I can’t say I had these same childhood experiences… actually if there was something I truly hated it was potatoes… so much so in fact that by the time I was in university I probably ate potatoes once or twice a year. Obviously this didn’t include fries, I mean how would one survive in university without fries… actually I wasn’t a big fry fan either… onion rings… mmmm…. Wait where was I going with all this? Oh yeah, meat loaf. I love ground meat. Take an animal, put them through a meat grinder and cook them up and I will devour with enthusiasm. So I really wanted to try my hand at this meat loaf thing.

The first obstacle was locating the ground veal for the meat mixture. Every grocery store around me that I thought would have it didn’t. So I started looking for butchers in my area that could fulfill this request. Had a short list ready when I was swinging through the local discount grocery store and what did they have… a rather fine selection of ground meats. I was surprised because this is that last place I would have thought to find ground veal… maybe prepackaged veal cardboard cutlets or something but not fresh ground veal. Local farms must have been overstocked on young cows or something for this to end up here. Anyway I am rambling again. I noticed the veal, grabbed it and said tonight I am making meat loaf! Actually I thought that, I didn’t say it out loud, that would have been odd and slightly crazy.

Putting the meat loaf together was simple enough. Even I can measure liquids and throw them all together in a bowl and mix. The fun part was taking this amalgam of meat and spices and molding it into a free-form loaf, no loaf pan in this recipe! I resisted the artistic urge to sculpt it into a masterpiece and went with a traditional rectangular loaf… except it was more like a square. Then it gets covered in bacon. Bacon-wrapped ground meat. I think I know why I selected this recipe.

There is a glaze for this meat loaf consisting of ketchup, brown sugar and vinegar. I am not someone who traditionally likes ketchup. In fact the only reason it is even in our house is for the kids. But since the recipe did call for it I’ll put my personal preferences aside (I’m sure eating ketchup will be the least of my concerns as I dive into some of these recipes).

By the time the meat loaf had finished cooking and reached the recommended internal temperature my mother-in-law had stopped in for a quick visit. As she stepped into the kitchen and looked at my wonderfully crafted meat loaf, glistening with a red-hue imparted by the glaze and bacon fat, she turned to me and said, “What is that a ham?” I can understand the question, after all my house did smell of bacon.

I enjoyed this recipe greatly. It was fun to put together and was moist and flavorful. If I was to do this again (which I can say I most likely will), I would probably put a little more hot sauce in the meat mixture and use a glaze with a little more bite. It had a nice flavor but that flavor was mild.

The Next Day

Re-heated pretty well and didn’t lose too much moisture. I only had a small piece since we ate a good portion of it the night before… I actually looked forward to eating this and had to resist the urge to eat lunch too early.


LinkWithin Related Stories Widget for Blogs